Writing for the User Experience: The Three “E”s of Technical Writing

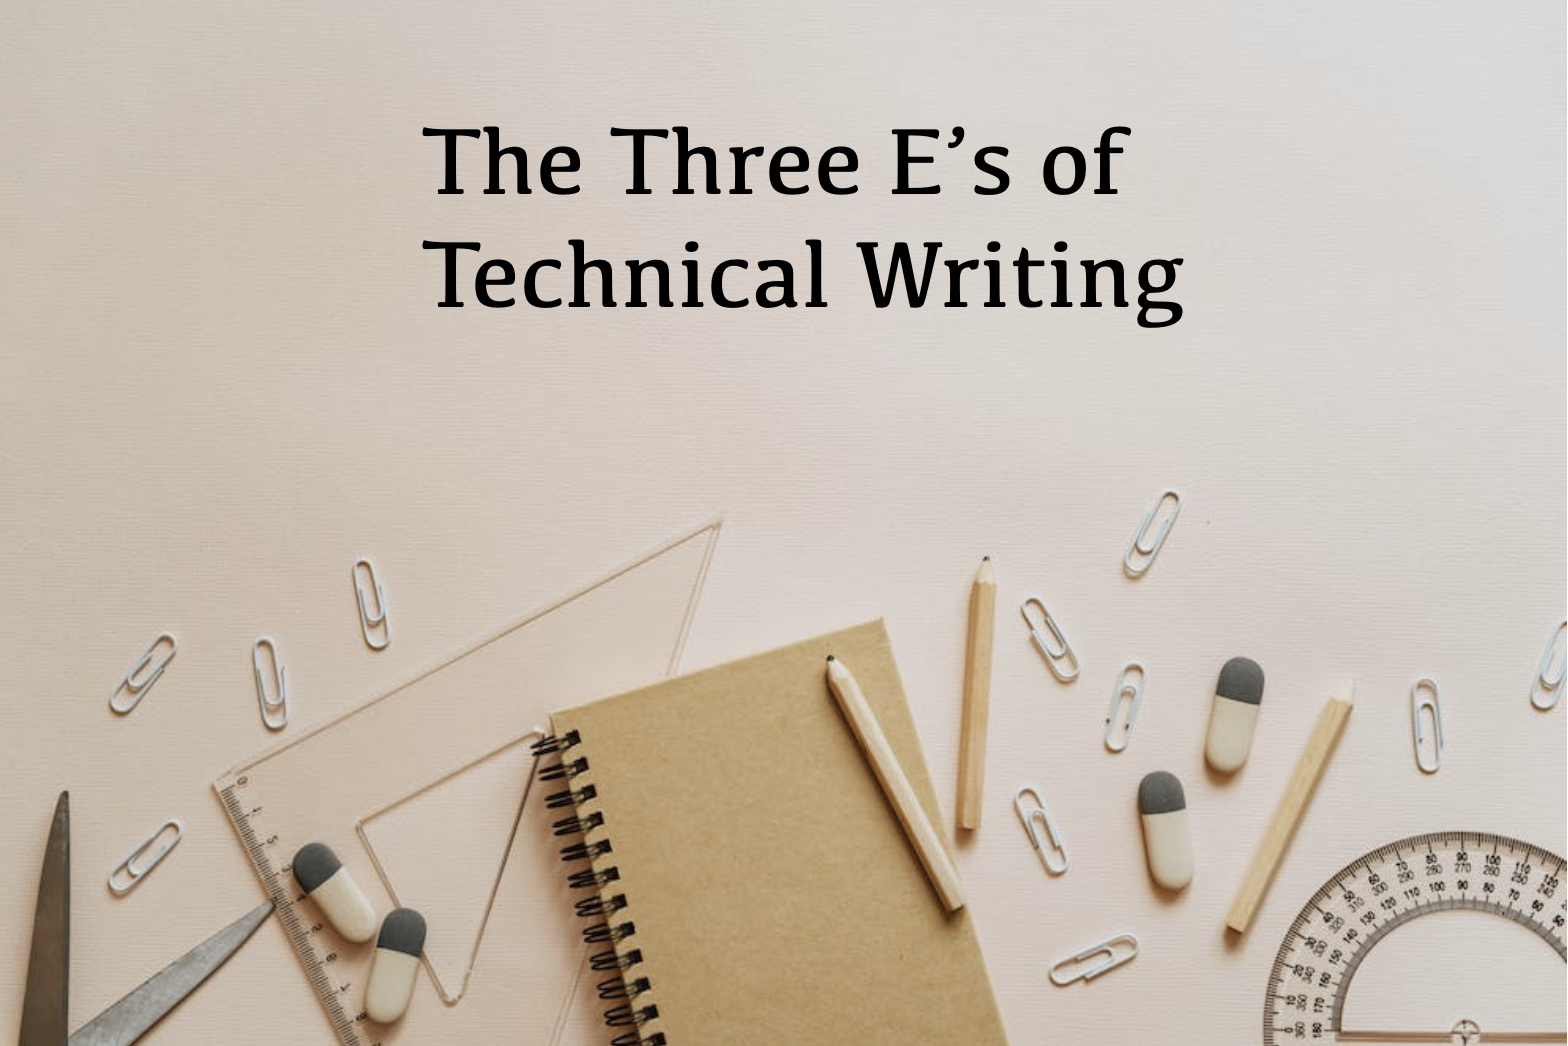
As technical writers, we know that documentation is vital to the user experience but, the best technical writers know that the key to a great UX is to include the three “E”s: expectations, engagement, and empowerment. By keeping these three elements top-of-mind, technical writers can produce documentation that exceeds user expectations, engages them on a personal level, and empowers them to be successful. Let’s take a closer look at each of these three “E”s.

  1. Expectations

The first “E” stands for expectations. It’s important to set the right expectations for your users from the very beginning. For example, if you’re writing documentation for a complex piece of software, it’s important to let the user know that upfront. Otherwise, they may get frustrated when they encounter difficulty using the software and think it’s due to a lack of understanding on their part.

Your users will have expectations too. They expect the document to be clear, concise, and free of errors. They also expect it to be easy to navigate and understand. If your document falls short in any of these areas, users will likely become frustrated and give up on trying to use it.

2. Engagement

The second “E” stands for engagement. In order to keep your users engaged with your documentation, you need to write in a clear and concise manner. Using plenty of headings and subheadings to break up the text will make it easier to scan and don’t forget to include plenty of examples and screenshots to illustrate key points.

In addition, it is also important to engage users on a personal level. One way to do this is by using case studies or real-world examples whenever possible After all, people are more likely to use something if they feel a personal connection to it. When writing your documentation, be sure to use a tone and style that is approachable and relatable. Write like you would speak— without using jargon or overly technical language.

3. Empowerment

The third “E” stands for empowerment. Your goal should be to empower your users with the knowledge they need to be successful. Give them the information they need to complete their tasks efficiently and effectively. Anticipate their questions and concerns ahead of time so that you can address them before they even have a chance to ask In addition, don’t forget to include links to additional resources where users can go for more help if they need it. By empowering your users, you’ll create advocates for your product or service—and for your company as a whole.

The next time you sit down to write some documentation, keep the UX in mind by including the three “E”s: expectations, engagement, and empowerment . . . your users will thank you for it!

App of the Week: Alfred

Ditch Spotlight for this genius universal search bar on Mac

Spotlight is a powerful tool on the Mac, but it doesn’t even compare to the third-party app Alfred and its countless user-developed workflows.


By Taylor Martin of CNet

Apple’s Spotlight for Mac is a wonderful tool, but even with Siri and a third-party add-ons coming this fall, Spotlight doesn’t compare to one of my all-time favorite applications, Alfred.

Alfred looks and acts much like Spotlight. But with the add-on Powerpack, it gets a lot smarter. The $22.04 (£17.00 or AU$28.61) app adds “workflows,” which make your Mac do a chain of tasks with one command.

The best workflows for Alfred

If you’re ready to ditch Spotlight, install these add-ons to change the way you use your Mac. Seriously.

To install one of these workflows, follow the link to download it, double-click to open and the workflow will install itself.

  • Google Suggest does exactly what you would expect it to. It puts suggested searches inside Alfred. Press your launch command for Alfred (by default, it’s Options + Spacebar) and type “g” followed by a space. Then type your search query. With each keystroke, the list of suggested searches narrows. Use arrow keys or the hotkey (listed to the right of the result) to select one and load the search results in your default browser.
  • Amazon Suggest is the same thing for Amazon searches. Launch Alfred and type “amazon,” followed by your search query. Highlighting and selecting one of those results will launch the Amazon search in your default browser.
  • Curious how critics feel about a new movie? Use the RottenMovies workflow to find out. Type “rt” followed by the name of the movie. The workflow will search Rotten Tomatoes and you can see the score without ever visiting the website.
  • Sitting at a desk all day, it’s easy to let 10, 20 or even 30 minutes slip by unnoticed.
  • Sometimes you need to set quick reminders for yourself to respond to someone in 20 minutes or check the coffee pot in 5. EggTimer 2 is the perfect workflow for this. Launch Alfred and type “timer 5 Check coffee pot” to set a 5-minute timer with a reminder to check the coffee pot. You can also set alarms for specific times using the same syntax: “alarm 4:00pm Take a break” or “alarm 12:00pm Lunch.”


  • When writing, I’m constantly switching between my writing app and Google search for currency and unit conversions. With the Units workflow, I can make those same conversions without ever leaving my writing app. In Alfred, type “units” and type or select what you want to convert from the list of options (length, temperature, currency, etc.). Next type a number and select the starting unit from the options and finally select what you’re converting to. When you hit enter at the end, the conversion is copied to your clipboard for pasting. It will take a few tries to get the process down, but once you do, this is one of the most handy converters around.
  • The Recent Items workflow is great for helping you recall things you have been working on in the last few hours. Install the workflow and launch Alfred, then type “rec.” The workflow will suggest types of recent items, such as applications, downloads, folders or up to two custom items. Select one of the types of files from the selection (or begin typing to narrow the suggestions) and all the recent items of that type will appear. Selecting one will open it.
  • After you get used to a keyboard launcher like Alfred, it’s difficult to break the habit of launching Alfred when you want to do anything, even things that you don’t normally control with Alfred, such as adding new tasks to your task manager. Fortunately, you can add that functionality with workflows for Trello, Wunderlist and Todoist.
  • Sometimes toggling Wi-Fi will fix any connectivity issues you’re experiencing. It’s not a difficult task on OS X, especially with the menu bar icon. However, the Wi-Fi Control makes it a much faster process. You can turn Wi-Fi on or off with the workflow, but you can also restart Wi-Fi (toggle off and back on) with just a few keystrokes.
  • The Kill workflow is easily the one I use the most. If you have a rogue app that gets hung or you need to force quit, launch Alfred, type “kill” followed by the first few letters of the app and press Enter. It will immediately kill any apps or processes.
  • I also do a lot of link shortening for personal analytics. The Shorten URL workflow is fantastic. It includes support for goo.gl, bit.ly, is.gd, j.mp and more. With the workflow installed, launch Alfred and type “short” followed by a space, paste the URL you want to shorten and select the link-shortening service. The shortened link will be copied to your clipboard and automatically pasted wherever your cursor is placed.


  • It’s easy to use the same password over and over. But if you use a password manager, quickly generating a new password is the more secure route. With the Password Generator workflow, type “pw” followed by a number for how many digits you’d like the password to have. Press enter and the randomized password will be copied to your clipboard.
  • Sleep is a sleep timer workflow for your Mac. Just type “sleep” followed by the number of minutes you want your computer to stay awake. After the timer finished, the Mac will go to sleep.
  • Who doesn’t love GIFs? Alphy puts Giphy search right inside Alfred. Just type “gif” followed by your search term. Highlight one of the suggestions and press Shift to preview it. Pressing Enter will copy the URL of the GIF to your keyboard, Command + Enter will copy the Giphy URL and Alt + Enter will open the GIF on the Giphy website.
  • There are several ways to quickly insert emoji with a Mac. Emoj is yet another way, and this one comes with search, which means you can find a specific emoji, even when you don’t know its exact name. The downside is that this requires Node to be installed on your Mac.
  • If you’d prefer unicode emoticons over emoji, Dongers is the workflow you’re looking for. Type “dongers” and your search term for a list of relevant emoticons, like the table flip. (ノಠдಠ)ノ︵┻━┻
  • One of the first things I do if my internet connection is having problems is run a speed test. The SpeedTest workflow allows you to do this without loading the speedtest.org site in your browser. Type “speedtest” press enter and wait. When the test completes, you will receive a growl notification with your uplink and downlink speeds, as well as your ping.

Have you tried Alfred? What are some of your favorite workflows? Sound off in the comments below!!

How to: use the extra features packed into Apple’s tiny AirPods

Yes, AirPods are clearly for playing music but you can rapidly choose where that audio comes from —and just what happens when you tap on the AirPods. AppleInsider details all the options.


By William Gallagher of Appleinsider

You can be listening to music moments after you first put AirPods into your ear and we may never get used to how great that is. However, just because they are designed so that you can pop them in and go, it doesn’t mean this is all they can do.

AirPods don’t have screens and they don’t have tangible buttons. But, the AirPods themselves and the charging case are replete with functions. You can edit touch controls so that a tap on your right AirPod plays the next track while a tap on the left one calls up Siri.

To help you keep your iPhone in your pocket, Siri can whisper the name of your caller into your AirPods as your phone rings. You can so easily switch to listening to your phone or your iPad.

And you can only slightly-less-easily switch to listening to your Mac, your Apple TV and even your Apple Watch.

No screens

There may not be a screen on these tiny AirPods but if you open their case while you’re next to your iPhone, the phone will display information.

Just opening the AirPod case tells the iPhone to pay attention and shows battery information. You get the current charge of the case and an average of that for the two AirPods. Put one AirPod in your ear and now you get the individual battery charge for each one.

It’s worth checking this instead of relying on that average, too, because very often the two AirPods will have different levels of charge. Even though you always charge them in the case together, one may be significantly lower than the other.

That’s because one of them may have been acting as a microphone when you’ve received phone calls.

You get this information when the AirPods have been paired to your iPhone. If they haven’t been yet, find the small white button at the back of the AirPod case and hold it in.

After a few seconds, this makes the AirPods and their case discoverable over Bluetooth and your phone can find them.

Even when you’ve got them paired, though, that’s not the same thing as having them connected. To quickly connect your AirPods, swipe to bring up Control Center, then tap on the small symbol at top right of the Music section.

This is the quickest way to connect and start playing music to your paired AirPods but there is a slightly longer way around too.

With one exception to do with phone calls, you control all of your AirPods via the Bluetooth preferences in your iPhone’s Settings. Go to Settings, Bluetooth and look for your AirPods in the list of paired devices.

Next to its name there will be a Connected or a Not Connected label. It’s a toggle: tap on Not Connected and it will connect or vice versa.

There is also an Information button to the right. Tap on that and if your AirPods aren’t connected, all you see is an option to Forget this Device.

If they are connected, though, that’s when you get direct access to most of the AirPods’ best features.

Ears and throat

From here you can do the big moves like disconnecting the AirPods or, again, Forget This Device. You can also change the name of your AirPods. By default they’re called your ones, as in “William’s AirPods” or “Rachel’s AirPods”.

If William or Rachel are ever mad enough to give up their precious AirPods and they really, really like you, then you can change the name here.

Toward the foot of the settings page there is an option to have Automatic Ear Detection on. It’s the default but if it’s ever not on, switch it on. This is how the AirPods are allowed to do something with the information that you’ve just picked them up and popped them into your ear.

Similarly, it’s how they are allowed to respond when you take the AirPods out. And it rarely gets better than when you take out one AirPod and the music pauses long enough for you to hear them say “Oh, I didn’t realise you had headphones on”. That never gets old.

There’s also a Microphone option which lets you specify which of your two AirPods acts as a microphone when you’re on a phone call or recording audio.

The default is to have the AirPods themselves decide, to switch automatically to whichever one seems best. The only criteria we can think of is that if, say, the Right AirPod’s battery is low, they could switch to using the Left.

Except the reason that one AirPod’s battery will be lower than the other is that it’s been used as the microphone. So how the AirPods pick which goes first is a mystery.

It’s also hard to think of many situations where it would bother you which was the microphone. The earpiece, yes: if you happen to have poorer hearing in one ear than the other then you would of course choose the other one —except this isn’t about hearing, it’s about speaking.

So just leave this set to the default of Automatically Switch AirPods and move on to your ears.

Left ear, right ear

AirPods respond to your putting them in your ears and taking them out again. They also respond to your finger quickly tapping on them twice. Since you have two AirPods, you can tap on either —and you can choose what happens when you do.

It’s not the greatest selection of options. It would be fun to see what an AirPod equivalent of BetterTouchTool or Keyboard Maestro could do, but for now you get five options per ear.

Three are to do with music. You can set that a double tap means to Play or Pause the music, that it means to skip to the next track or that it means repeat the previous one.

There’s also a Siri option. Select this and whenever you double tap on an AirPod, it will pause whatever you’re listening to and wait for you to ask Siri to do something.

The fifth option is just Off. That may be the dullest menu item Apple’s ever done.

Not all

All of these settings are done in the Bluetooth section of your iPhone’s settings. However, there is one more option you can set for your AirPods which needs you to go somewhere else.

Go to Settings, Phone. The first option under the Calls section is Announce Calls and normally it’s set to Never.

Tap on that line, though, and you can change it to have Siri announce your phone calls in three different circumstances. One is always, absolutely every time your phone rings. The others are to do with when you’re wearing AirPods —or any headphones —or you’re driving with CarPlay.

Whenever it’s set to announce your calls, that’s exactly what it does. You hear the ringing start and then Siri says the name of the caller if they’re in your Contacts.

It’s a bit quiet, to be fair. Or our ring tone is a little loud. We’re not sure which.

However, what it means is that you can leave your phone in your pocket and not even have to peek to see who’s calling. You do have to take it out if you want to answer but then you can pop it right back in your bag while you take the call on your AirPods.

Apple Watch

Of course, if you’re fully Apple-compliant then as well as AirPods you’ve got your Apple Watch. Then a turn of your wrist will show you who’s phoning and that probably means the audio announcement isn’t very useful.

When you tap on the Watch to accept the call, though, you can take it on the Watch or you can use your AirPods. If they’re connected to the Watch.

Whatever Apple Watch you have, there is music on it if you’ve also got an Apple Music subscription. You can leave your phone at home and tell the Watch to play music direct to your AirPods.

Back to the Mac

One oddity is that it’s still hardest to link AirPods to your Mac. It’s not as if it’s actually difficult: you click on the Bluetooth icon in your menubar then select the AirPods and choose Connect.

Only, it doesn’t always work. Why this should be the case with AirPods and not other Bluetooth devices is unfathomable but it regularly takes two or three attempted connections before we can be listening to our Mac over our AirPods.

Plus when you’re used to how quickly you can go between iPhone and iPad, it’s oddly slow going to the Mac. There is a workaround, though: a $2.99 menubar app called ToothFairy sorts it out. With a click on the menubar icon or the press of a keystroke, ToothFairy connects your AirPods to the Mac immediately.

Completing the picture

When you start listing all these Apple devices out, you do wonder how you ended up paying one firm all this money. However, if you also have an Apple TV then AirPods are now able to connect to them much more easily.

Originally, you had to go through the Apple TV’s Bluetooth settings. You’d go to that, then press-and-hold the button on the AirPod case until they were discoverable. Then the AirPods would appear on the Apple TV’s list of devices and you could choose to pair them.

That doesn’t sound like a big deal, not when it’s identical to the way you pair to a new iPhone, but it always seemed to take us a few goes to get it working right.

Whereas now, you can simply press and hold the Play/Pause button on your Apple TV Siri remote. That opens up a list of all audio devices attached or reachable on your Apple TV. When you flip open the case of your AirPods, they appear on the screen and you just select them.

When you’re at that screen, you can also press and hold on the selected audio device which will then change to a volume control. Considering that just using the remote control’s volume up and down buttons will do the same thing, it’s not the most use.

Perhaps none of these AirPod options on their own is going to shake the world but it is astonishing how much flexibility and functionality these things have.

And that’s even before next year’s rumored updates.

What’s your favorite feature of the AirPods? Tell us about it in the comments below!!

Weekly Round Up 9/7/18


Especially coming from a guy as corrupt at Ajit Pai…

The FCC chief’s call for cracking down on tech companies is not only laughable, it’s the ‘height of hypocrisy’


Here’s hoping one of them is designed to keep the Kardashians off the air…
10 Takeaways From Variety’s Entertainment and Tech Summit


The red tape alone is ging to take a millenium to get through…
A 22-year Apple veteran explains why Silicon Valley’s ‘fast fail’ approach won’t work with health tech


We were fools to think it could.

Now We Know Tech Won’t Save Us


Watson, you sneaky, little bastard…
IBM used NYPD surveillance cameras to develop facial recognition tech


If it helps produce more “People of Walmart”, it’s all good…
Exclusive: Walmart’s Tech Arm is Adding 100+ Jobs in Reston


Who needs eyesight when you’ve got Alexa & Siri?
Small screen, big problem: what tech is doing to your eyesight


I’m sorry, what did you say? I was checking my Facebook…

Google researchers say the tech industry has contributed to an ‘attention crisis’

App of the Week: TextSoap 8

Hands on: TextSoap 8 cleans up your text for online and publishers


By William Gallagher of AppleInsider

TextSoap 8 is supremely handy, easy to start. and hard to master —but so very powerful for writers of all ability levels.

From 1998 to around 2004, every website editor at BBC Worldwide in the UK had an extra button in their copy of Microsoft Word. When you clicked it, Word would ready your text to go into websites without any of the usual problems of the time. Smart quotes, the 66 and 99 marks, used to break the sites, for instance, so they were changed to plain ones. The BBC system had problems with dashes and certain types of parentheses too, plus a constant difficulty with the British pound symbol.

This Word button handled four or five such common issues but it was the quote marks it was known for. So much so that since it was changing smart quotes into dumb ones, it could’ve been called the Dumber. Instead, since “thick” is British slang for stupid, it was called Thickify. It made smart things more thick.

I know all this because I wrote Thickify. It was the single most successful piece of work I ever did at the BBC and hardly anyone who used it had any idea that it was mine or that it was a Word macro. They believed that it was part of Microsoft Word and when they’d upgrade that word processor, they would actually shout at IT people for apparently removing their big button.

A dozen BBC websites used it. Probably twenty editors, news editors or assistant editors used it. So did most of the writers on each of these sites. To this day I am proud of that work —and yet I see it was total rubbish compared to TextSoap 8.4.7.

TextSoap is the same idea and it does the same things. However, where my Thickify for BBC fixed four or five problems, TextSoap 8 does more than a hundred.

Paste some text into this Mac app and it will remove extra spaces, it will take out extra returns, it can remove every tab and so on. If you paste in the HTML source code from a web page, it will extract all the actual text from it.

Better and better

You don’t have to paste text into the app, though. Instead, you can call up TextSoap’s features from within practically any Mac app. Just select some text then click on the app’s name in the menu bar. Choose the little-used Services item from the menu that drops down and then TextSoap does its work.

In the background, it’s taking that selected text and putting it into its own app before cleaning it up and pasting it back.

It puts that text into its Clipboard Workspace but it’s also possible to open or create documents in TextSoap. It’s oddly resistant to closing them again, though.

We’d run it from the Services menu a few times and would sometimes find that it had opened new documents for each occasion. So we’d close them but the next time we’d run TextSoap, it would occasionally reopen a dozen. It’s probably something to do with macOS’s way of making apps reopen the last documents you were working on, but still we had positively chosen to close them.

When we’d run it from within another app like Pages or Word or Ulysses, though, we wouldn’t notice the documents at all because we stay in that app as it works.

Still, there’s a reason that macOS Services menu is so little used. You forget that it’s there and also to choose it you have to take your hands off the keyboard and use the mouse or trackpad. Since we’re doing this to speed up preparing text that we’ve typed, it would be great if you could just use a keyboard shortcut —and you can.

At the foot of the Services menu there is Services Preferences option. Choose that and you’re taken to the right section of System Preferences. It’s the Keyboard pane and Shortcuts/Services will already be highlighted.

If you’ve not been in this before or haven’t looked at Services on the Mac, your head will jerk back at the sheer number of options. Every app you’ve ever installed can provide a Service and so many do that your list is going to be long.

However, scroll on down and you will reach one called Clean with TextSoap 8. It will also say “none” next to it. Click on that to record a new keystroke that will open the Service for you.

After that, using TextSoap is a matter of selecting some text, pressing that button and taking your hands off the keyboard while it works. Depending on how much text you’ve selected, you may have to wait a while but it’s going to be enough time to flex your fingers, not enough time to get a coffee.


Takes all sorts

Perhaps it’s just because we are more habitually used to clicking on menubar items, we use Services only when we remember. The rest of the time, we click on TextSoap’s menubar app.

This does also have the advantage that where Services shows you only one or two TextSoap cleaners, the menubar app lists about 20 by default. So we can go directly to Straighten Quotes if we know that’s all we want.

There is more, though

If this all you use TextSoap for then you’re in good company: this is chiefly how we’ve used it for years.

However, it is preposterously more powerful and has practically a ludicrous number of options that we’ve explored from time to time.

They’re all to do with creating what TextSoap calls your own cleaners. The built-in option that straightens or thickifies smart quotes is a cleaner. The one that removes double spaces after a sentence is another.

While most of the time you’ll use one called Scrub which is actually a collection of many routines, each time you run TextSoap you are choosing a cleaner to work on your selected text.

It’s just that you can make your own. You have to open the main app, you can’t do this from the menubar version. Choose File, New, Custom Cleaner.

This gets you an editor window that’s divided into three key areas. Down the left there is a list of actions or existing cleaners that you can use. Each one comes with a detailed explanation of what it does and the only reason you’ll take a long time to get through this is that there are so many.

Then the greater part of the editor window has two sections arranged horizontally. At the top there is a Properties window and then underneath is an Actions one.

Or that’s the theory. We spent a frustratingly long time trying to understand how this section worked because we didn’t have that Actions part. It turned out that this was because we also didn’t have the very latest version of the software: while TextSoap has had this particular feature for some years, it somehow wasn’t displaying in our copy. Not until we updated.

When we did, this suddenly because much more familiar territory. If you’ve ever used Workflow, Automator or Keyboard Maestro then you’ll recognize the idea. You have a pot of actions to choose from and you drag in the ones you want into the order you want them to work.

Then you can edit them to make an action be more specific.

For instance, we created a cleaner called The Ize Have It where words written with the British English ending -ise were changed to the US English -ize.

We dragged in a Find and Replace action, then entered a pair of words like “equalise” and “equalize” and from now on this cleaner will make that swap. It was a bit tedious because we had to do a different Find and Replace for each pair of words. It would be better if you could load in a spreadsheet of them.

Still, no matter how many pairs of words we add, we’re adding them to one cleaner. Which means, every time we want to check and fix this problem, we run that and it’s done.

Worth the effort

TextSoap is worth putting some effort in to create your own cleaners because the time you spend now is saved later. You do it once and this tool is available forever.

It could be friendlier but really for the giant majority of times we use it, TextSoap is quite clear. We’d just like it to have some up to date documentation for those times we want to go further.

TextSoap 8.4.7 costs $65 direct from the developer. It’s also available as part of the Setapp subscription service.

There is a trial version available from the developer’s site which also points out that TextSoap has been around for 20 years. I could’ve just told the BBC to buy TextSoap version 1.0.

How to: Force Your iPhone to Switch Cell Towers for a Stronger Signal


By Matt Milano of Gadget Hacks

Having a dropped call can be incredibly frustrating, especially when you look down and see that your iPhone has full reception. While there’s any number of issues that can cause this, one common and often overlooked issue is your iPhone failing to switch cell towers as appropriately needed.

When you’re not switched to the appropriate tower, it means there’s a problem with the communication between your smartphone and cellular network. Either your iPhone tries to hold its connection to a cell tower that’s well outside the optimal range or the new cell tower is already overloaded with other connected devices.

How Cell Phones Switch Towers

Cell phones work with networks to determine the best tower to connect to based on range, signal strength, and the frequency being used. When a phone is connected to a cellular network, it continually checks the signal strength of nearby towers and communicates that information to the network. In theory, when a phone’s connection to a cell tower drops below signal strength of a nearby one, the network should switch the phone to the new tower.

Practically, however, this doesn’t always occur as smoothly as it should and common fixes, such as cycling Airplane Mode, don’t always work. While using the “Reset Network Settings” option will always work, it’s a drastic step that will also erase any saved Wi-Fi login credentials. Fortunately, there’s another simple way to force your iPhone to switch towers.

Install OpenSignal

OpenSignal is a network performance monitoring app that not only tells you the speed of your connection but also shows you what tower you’re currently connected to. You can search for “OpenSignal” in the iOS App Store directly or use the link below to jump right to it. Install just like any other app.

• App Store Link: OpenSignal – Speed Test & Maps (free)


Configure & Check Your Current Tower

Once you have OpenSignal installed and open, you’ll need to give it access to your location in the notification prompt. OpenSignal uses your position to show you nearby cell towers.

The app will also ask if you want to contribute signal data. OpenSignal uses this information to rate the carriers and provide customers with input on what carriers offer the best coverage in any given region; This is entirely voluntary, but if you do opt in, any information collected will be strictly anonymous.


After that, you’ll see a screen with an arrow pointing to the tower your iPhone is currently connected to. You can also tap the arrow to pull up a map displaying all the nearby towers operated by your carrier. You’ll want to recheck this after forcing a switch to confirm it was successful.


Force Your iPhone to Switch to a Better Tower

To manually force your iPhone to switch cell towers, open the Settings app, then tap “Cellular.” Next, select “Cellular Data Options,” then tap “Enable LTE.”

The setting will likely be set to “Voice & Data.” Cycle it to “Off,” wait 30 seconds, and then cycle it back to the previous setting, either “Voice & Data” or “Data Only.” Once your iPhone’s LTE antenna reconnects, it will search out the antenna with the strongest signal and connect to it, likely a different one that you were initially having issues with.


Verify the Tower Change with OpenSignal


Reopen OpenSignal to see if your iPhone is connected to a different tower. If the force switch was successful, the arrow on the main screen should be pointing to a different tower.

If it appears you’re still connected to the same one, it likely means there isn’t a better tower nearby. Other towers may be farther away, have a weaker signal, might not be using compatible frequencies, or may already be overloaded.

Either way, you’ll have another method to deal with pesky cell connection issues without taking any drastic measures.


Do you have any hacks for improving Call Signal on your phone? Tell us about it in the comments below!

App of the Week: VSCO

Here’s the app you need to make your iPhone photos good enough for Tim Cook to share!


By Martha Tesema of Mashable

It’s World Photography Day, which means Tim Cook is celebrating in a very Tim Cook way: sharing #ShotOniPhone snapshots.

On Sunday, the Apple CEO tweeted the breathtaking work of John Bozinov — a photographer who focuses on wildlife and portraits. Bozinov is a master of iPhone photography, and the images that Cook shared are breathtaking examples of his work capturing life in Antarctica.

But it’s kind of hard to believe they were actually shot on an iPhone, especially when you compare them to the smartphone pics we normally see on our timelines.

At first glance, it’s easy to assume Bozinov attached a newfangled lens (perhaps from the masters of iPhone accessories, Moment), but as he told Mashable in 2016, there are no extra gadgets involved when he takes pictures. It’s just good, old-fashioned editing with an app that has revolutionized iPhone photography: VSCO.

The app has been quietly improving your Instagram feeds for years, with easy-to-use tools that adjust everything from color saturation to exposure. For those less formally trained in photography (no shame!), VSCO also offers a bevy of presets that do the job for you.

VSCO, which stands for Visual Supply Company, was founded by Greg Lutze and Joel Flory in 2011. Since its inception, it’s grown into a community hub offering grants along with editing tools and presets. The app also doubles as a platform on which to share your work (every user has “journals” they can post images to).

Seven years later, the app’s impact is obvious. The internet is saturated with how-to-guides on creating the perfect image and maximizing the tools on the app.
That said… VSCO can’t fix what’s already broken. If you’re looking to be Cook’s next featured tweet on #WorldPhotographyDay, here are some things you can do to make your iPhone photos sing before opening up any app.

1. Focus on lighting

“A lot of my work is outside, and the iPhone works really well with that, because there’s lot of light around,” Bozinov said in his 2016 interview with Mashable. That abundance of lighting is what makes his photos stand out compared to the pics on your personal camera roll.

Keep an eye out on how much light there is next time you whip out your phone. The more light, the clearer the image – and the easier it will be to make the technical adjustments that you need to transform your iPhone pics into masterpieces that you’ve always wanted.


2. Don’t forget to maintain stability

“Whether I’m shooting in portrait or landscape mode, I like to hold the iPhone with my left hand and release the shutter with my right thumb. I recently learned that the camera shutter isn’t released until you take your thumb off the shutter button on the touch screen,” photographer Cotton Coulson told National Geographic.
Since that’s the case, making sure you have as steady of a hand as possible when capturing a shot is key. You have to be a human tripod.


3. It’s ultimately all about composition

Composition is essentially just how you arrange the photo, so next time you’re walking down the street, pay attention to the colors, shadows, colors, and scenes — and frame it up in a way that looks interesting!


What’s your favorite photo editing app for your phone? Tell us in the comments below!!

How to: Use AirPlay

Minimum Requirements and Basic Information


by Sam Costello of Lifewire

For many years, the music, videos, and photos stored in our iTunes libraries and on our computers were stuck on those devices (barring complex file-sharing arrangements). For Apple products, that has all changed with the advent of AirPlay (formerly known as AirTunes).

AirPlay lets you stream all kinds of content from your computer or iOS device to other computers, speakers, and TVs.
It’s a pretty neat, and powerful technology that’s only going to get more useful as more products support it.

You don’t have to wait for that day to come, though. If you want to start using AirPlay today, read on for tips on how to use it with many existing devices and apps.

AirPlay Requirements

You’ll need compatible devices in order to use AirPlay.

  • A Mac or PC
  • An iOS device running iOS 4.2 or later
  • iTunes 10.2 or later (some earlier versions support AirTunes or more limited AirPlay implementations)
  • Any iPad model
  • iPhone 3GS or higher
  • 3rd generation iPod touch or newer
  • Any Apple TV model
  • AirPort Express
  • Compatible third-party apps
  • Compatible third-party hardware like speakers or stereo receivers

Remote App
If you have an iOS device, you’ll probably want to download Apple’s free Remote app from the App Store. Remote allows you to use your iOS device as a remote (are you surprised?) to control your computer’s iTunes library and what devices it streams content to, which saves running back and forth to your computer each time you want to change something. Pretty handy!
Basic AirPlay Use

When you have a version of iTunes that supports AirPlay and at least one other compatible device, you’ll see the AirPlay icon, a rectangle with a triangle pushing into it from the bottom.

Depending on what version of iTunes you have, the AirPlay icon will appear in different locations. In iTunes 11+, the AirPlay icon is in the top left, next to the play/forward/backward buttons. In iTunes 10+, you’ll find it in the bottom right-hand corner of the iTunes window.

This allows you to select a device to stream audio or video to via AirPlay. While earlier versions of AirTunes required you to set iTunes to seek out these devices, that’s no longer necessary – iTunes now automatically detects them.

As long as your computer and the device you want to connect to are on the same Wi-Fi network, you’ll see the names you’ve given the devices in the menu that appears when you click the AirPlay icon.

Use this menu to select the AirPlay device you want the music or video to play through (you can select more than one device at the same time), and then begin playing music or video and you’ll hear it playing through the device you selected.
See how to enable AirPlay for iPhone for a walkthrough.

AirPlay With AirPort Express

One of the easiest ways to take advantage of AirPlay is with the AirPort Express. This is around $100 USD and plugs directly into a wall socket.

AirPort Express connects to your Wi-Fi or Ethernet network and lets you connect speakers, stereos, and printers to it. With it serving as the AirPlay receiver, you can then stream content to any device attached to it.

Simply set up the AirPort Express and then choose it from the AirPlay menu in iTunes to stream content to it.
Supported Content

The AirPort Express supports streaming audio only, no video or photos. It also allows wireless printer sharing, so your printer no longer needs a cable attached to your computer to work.

Requirements

  • iTunes 10.2 or later
  • At least one AirPort Express running firmware 7.4.2 or newer (you can use multiple AirPort Expresses in the house)
  • Speakers (or printer) to plug into the AirPort Express

AirPlay and Apple TV

Another simple way to use AirPlay in the home is via the Apple TV, the tiny set-top box that connects your HDTV to your iTunes library and the iTunes Store.

The Apple TV and AirPlay is a powerful combination indeed: it supports music, video, photos, and content streamed from apps.

This means that with the tap of a button, you can take the video you’re watching on your iPad and send it to your HDTV via the Apple TV.

If you’re sending content from your computer to the Apple TV, use the method already described. If you’re using an app that displays the AirPlay icon (most common in web browsers and audio and video apps), use the AirPlay icon to select the Apple TV as the device to stream that content to.

Tip: If the Apple TV doesn’t show up in the AirPlay menu, make sure AirPlay is enabled on it by going to the Apple TV’s Settings menu and then enabling it from the AirPlay menu.

Supported Content

  • Audio streamed from iTunes or iOS devices
  • Video streamed from iTunes or iOS devices
  • Video from iOS apps (e.g. YouTube app or video embedded in web pages)
  • Photos from computers or iOS devices
  • Mirroring a device’s screen on the TV

Requirements

  • Apple TV: 2nd generation Apple TV and newer for video and photos, or 1st generation Apple TV for audio only
  • iTunes 10.2 or higher
  • iOS device running iOS 4.3 or higher to stream content from third-party apps, or iOS 4.2 or higher to stream from built-in iOS apps
  • An HDTV

AirPlay and Apps


A growing number of iOS apps support AirPlay, too. While the apps that supported AirPlay were initially limited to those built by Apple and included in iOS, since iOS 4.3, third-party apps have been able to take advantage of AirPlay.

Just look for the AirPlay icon in the app. Support is most often found in audio or video apps, but it may also be found on videos embedded in web pages.

Tap the AirPlay icon to select the destination you want to stream content to from your iOS device.
Supported Content

  • Audio
  • Video
  • Photos

Built-in iOS Apps That Support AirPlay

  • Music
  • iPod
  • Videos
  • Photos
  • YouTube
  • Safari

Requirements

  • AirPort Express, Apple TV, or compatible speakers
  • iOS device running iOS 4.3 or higher to stream content from third-party apps, or iOS 4.2 or higher to stream from built-in iOS apps
  • App that supports AirPlay
  • AirPlay With Speakers

AirPlay With Speakers

There are stereo receivers and speakers from third-party manufacturers that offer built-in AirPlay support.

Some come with compatibility built in and others require aftermarket upgrades. Either way, with these components, you won’t need an AirPort Express or Apple TV to send content to; you’ll be able to send it directly to your stereo from iTunes or compatible apps.

Like with the AirPort Express or Apple TV, set up your speakers (and consult the included manual for directions on using AirPlay) and then select them from the AirPlay menu in iTunes or your apps to stream audio to them.

Supported Content

  • Audio

Requirements

  • iTunes 10.2 or later
  • Compatible speakers
  • iOS device running iOS 4.3 or higher to stream content from third-party apps, or iOS 4.2 or higher to stream from built-in iOS apps
  • App that supports AirPlay


Do you have a favorite AirPlay Hack? Tell us about it in the comments below!

WIT: Fitbit’s lousy period feature proves the need for more women in tech


By Cara Curtis of The Next Web

Once again it has being proven that more women are needed in tech after Fitbit’s period tracking feature only allows women to log their menstrual cycle if it lasted for 10 days or fewer.

How long does your period last? Five days? A week? Two weeks? A month? It’s a question that doesn’t have a consistent answer month by month.

Your cycle can alter depending on your lifestyle and type of contraception. Not to mention the obvious, but every woman’s body is different. Or maybe this isn’t so obvious for the guys behind Fitbit’s latest menstrual tracking feature.

Fitbit
has been around since 2010 and in its time has sold more than 75 million devices globally. The period health tracking feature however, was only added onto Fitbit’s devices in May 2018.

Why did it take eight years to introduce the feature when women have been tracking their periods since the beginning of time?

The feature works in a similar way to other fertility and period tracking apps like the disastrous Natural Cycles. It tracks a woman’s period length (unless it’s over 10 days), it will then send notifications two days before the user’s period is due to start and it also claims to provide information about fertility, but don’t get me started on that.

For the millions of women out there who suffer from conditions like Endometriosis – this condition makes a woman’s period length vary from 21 to 35 days – the period tracking feature therefore becomes difficult to use with the current limitation.

Asides from the limited time you’re allowed to be on your period for, the menstruation tracker only allows a user to choose from five period “conditions” (or as we call them, symptoms). These include, acne, headache, tender breasts, or sickness.

Whilst these symptoms are what can happen to a woman during her menstruation, it seems that Fitbit have forgotten to mention the other common issues like food cravings, cramps, bloating, moods, muscle aches, tiredness, and stress (the list goes on).

Twitter user @Stephanenney took to Twitter when she noticed her FitBit set limitations to the length of her cycle. After attempting to extend the length, she was greeted with a notification explaining, “Periods should be between one and 10 days” with the two options been “OK” and “Cancel”.


Nothing like an app telling you what your period should be like, eh?

Fitbit announced that any users concerned about the limited period tracker should go to the suggestions board which welcomed many users expressing their anger towards the limitation.

Some of Fitbit’s moderators have joined in the discussion and agreed at times but currently, Fitbit have showed no signs of modifying the feature.

One user nailed it on the head with her comment on the forum, “Locking the entire female population into a 10 day period makes me wonder how many women were involved in creating this feature… please fix”

While it’s great that leading fitness companies like Fitbit are finally paying attention to women’s health, this particular feature was set up to fail due to ignorant research (and the apparent lack of female employees).

This feature had the potential to provide interesting data about a women’s body and what happens during their cycle. Until this feature gets a needed update, and then another one, I’ll stick to using my calendar.

App of the Week: What’s the best calendar app for iPhone?


By Bradley Chambers of 9to5Mac

Calendar apps for iPhone are a tough thing to advise for because different people use them in different ways. Some people are busier than others (meeting wise), and others use their calendar as a to-do system (personally I question your sanity if you are this way). All of the primary calendar apps I tried are great but might not fit how you use a calendar app.

When using third-party iOS apps, it’s straightforward to try new ones because they request access to your calendar data using Apple’s APIs (so it works with Exchange, iCloud, Yahoo, AOL, and Outlook.com). This feature keeps you from having to set up different apps individually. I’ll explain what I like about each one, and which one I like best.

Apple’s Calendar App

There is a lot to like about Apple’s default calendar app for iPhone.

It shows the date icon on the home screen (something no other app can do without using a notification badge). When I’m using this app, I stay in the “List View” so I can scroll my upcoming events. I don’t have a lot of events on my calendar (I tried to avoid meetings like the plague). I do like to be able to get a quick glance at my week to know what I have coming up. It’s heavily integrated with the rest of Apple’s platform.

Apple’s app does a lot of things well. It integrates all of your calendars into a single app, provides timely travel time information (pulling the data from Apple Maps traffic data), and is easy to use. Where it could improve is in its “time to enter an appointment.” While it has added things like auto-complete, it really should add better natural language input for quick entry. For many apps now, that is a standard feature. If you are entering a lot of events on your iPhone, Apple’s calendar app will get tedious quickly.

Fantastical

When I asked people for their recommendations on Twitter of their favorite calendar apps, Fantastical was mentioned by many people. That is with good reason as well. It’s long been a gold standard for third-party calendar apps. It’s the pioneer of the natural language input for calendar apps (unless I am missing an app that did it so well first).

Fantastical has a lot of things going for it. It’s extremely fast to add new events using its natural language input (dinner with mom Saturday at 7:00 pm will add it). You can add in your iOS reminders, use Google Maps as your default map app (when you tap on an address), and it has a beautiful design. Fantastical also has an excellent Today widget for getting quick access to your calendar.

Fantastical for iPhone is $4.99 on the App Store which includes an Apple Watch version.

Week Calendar

If you have a hectic schedule, Week Calendar may be an app you’ll want to check out. It includes a number of different views (week, list, month, agenda, etc.). The week view is probably the most interesting one. You can see your entire view from a single screen. You can drag and drop events to new dates/times.

It lacks a natural language input, but it does have a Calendar Store. The store is an exciting add-on. You can add things like weather forecasts, famous birthdays, sports calendars, and more to your list. Adding these calendars requires a $2.99 per year in-app purchase (or $5.99 for three years).

From a customization standpoint, it’s probably got the most significant feature set. You can customize the icons it uses, the default new event layout, and the various colors.

If you have a lot of events on your calendar, I highly advise you checking out Week Calendar.

It’s $2.99 on the App Store.

Calendars 5

Calendars 5 is from the folks at Readdle. They are the developers of some of the best iOS and macOS apps (Documents, PDF Expert, Spark, etc.).

Calendars 5 reminds me a lot of Fantastical. They share a lot of similar features (natural language input, the ability to use Google Maps, and integration with Apple’s Reminders). It has a variety of views: List, Day, Week, and Month. Like I mentioned earlier, I probably prefer a list view, and Calendars 5 shows me the least amount of information compared to Apple’s app or Fantastical.

Overall, it’s a great app. It’s easy to create events, has multiple viewing options, offers plenty of customization, and much more.

Calendars 5 is $6.99 on the App Store.

Google Calendar

You might be wondering why I am listing the Google Calendar app on an iPhone calendar app roundup. Well, it can show more than just your Google Calendar. It defaults to it, but you can quickly add any calendar that you’ve already added to your iPhone.

Google Calendars on the web has always been a first class service. The iPhone app is no different. It contains natural language input, deep integration with your Gmail/G-Suite account, and some exciting extra features (showing a haircut theme if your appointment is a haircut, etc.).

There’s nothing I dislike about the app, but something about the design doesn’t sit well with me. Functionally, it all works, but it just feels like the design doesn’t fit in with the iPhone.

Google Calendar can be download for free on The App Store

BusyCal

BusyCal is probably best known for its long standing macOS app. There is also a companion app for iPhone, though! It contains a similar view to other apps (list, month, week, and day). You can create events using natural language. You can also add tags to events (could be helpful with project management).

Out of all the apps I tried, it reminded me of Apple’s Calendar app the most. In fact, if it was called Calendars+, that would be an appropriate name. It includes a live ten-day weather view (helpful for planning outdoor events). Like some of the other apps, it can also integrate with Apple’s Reminders app so you can have both tasks and calendar in a single app.

BusyCal was also one of the few apps I found (outside of Apple’s) that contained travel time notifications.

BusyCal for iPhone can be bought on the App Store for $4.99.

Wrap Up

Overall, I am torn between two apps. I find a lot to like with Apple’s default calendar app, but Fantastical also fits my needs. If you like Apple’s app for specific features, then you can probably stick with it. If you want something a little bit more, check out Fantastical. If you are a heavy meeting person, Week Calendar is one I’d recommend. In reality, I didn’t try one that I couldn’t easily use day to day. We are extremely fortunate to have so many great options.

What’s your favorite Calendar App? Share it with use the comments below!

Create a website or blog at WordPress.com

Up ↑

%d bloggers like this: